Gần đây trên nhiều kênh youtube mình hay theo dõi về web developer thì thấy xuất hiện ngày càng nhiều project được làm với T3 stack (Nextjs, Tailwind, Prisma,...) Vậy T3 stack là gì? Nó có gì hot?
Đến thời điểm hiện tại thì mình cũng mới chỉ research một chút về T3 stack thôi nên cũng chưa có kiến thức thực tế nào về các dự án làm từ T3 stack. Vậy anh em cùng mình đi tìm hiểu xem nó là gì nhé :))
Create T3 App
Cứ follow doc của t3-stack ở đây mà làm thôi: Installation • Create T3 App
npm create t3-app@latest
Sau đó enter select các option mà mình muốn, mình thì sẽ chọn full options luôn để xem nó như thế nào: Typescript, NextAuth, Tailwind, Prisma, Trpc.
Đợi nó install hết các package cần thiết xong thì chúng ta đã có source code rồi.
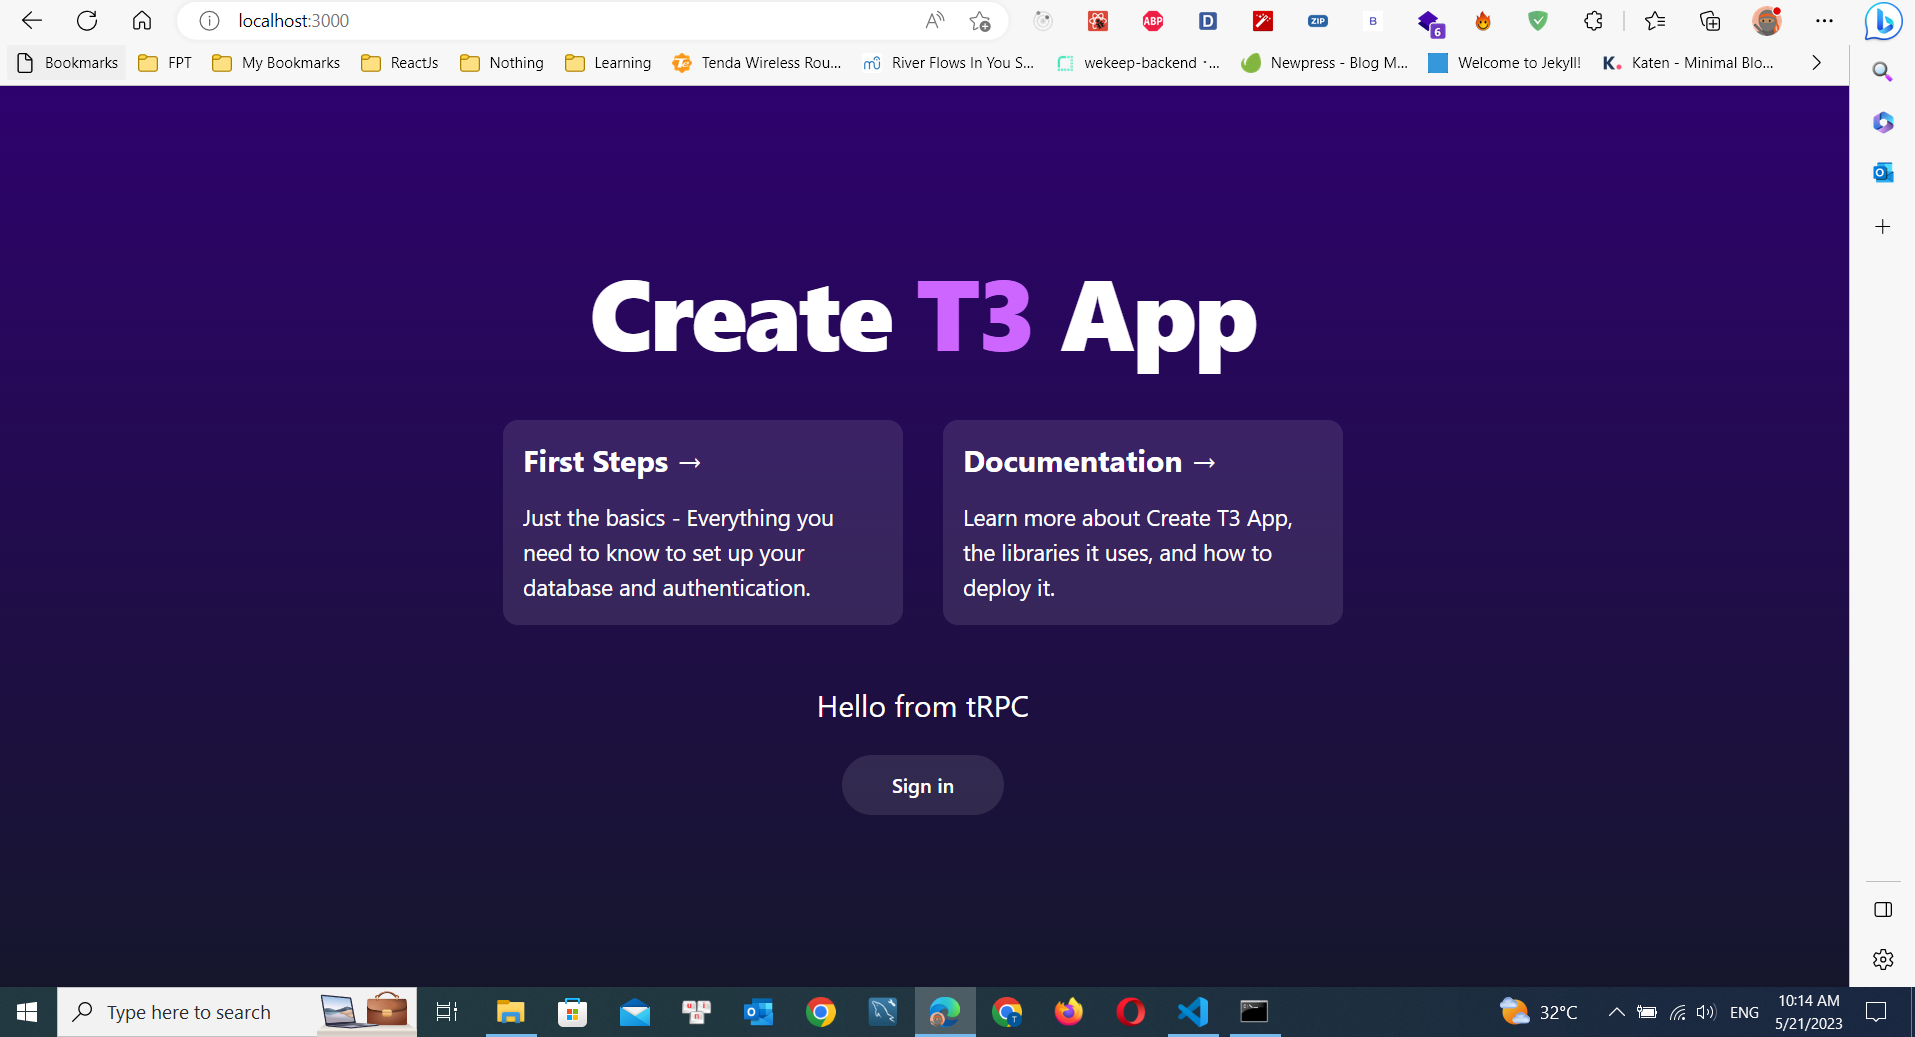
Thử run app lên xem thế nào bằng npm run dev nhưng của mình lại bị lỗi luôn thế này:
SyntaxError: Unexpected token '??='
Search google thì là do node version phải từ bản 18 đổ lên. Thế thì mình sẽ dùng nvm cài hẳn bản node v20.2.0 mới nhất bây giờ luôn :v
Run lại app cái thì ăn luôn =))
Connect to database
Anh em thấy t3-stack có dùng thằng Prisma (optional) thì theo tìm hiểu của mình và hỏi ChatGPT :
Prisma được thiết kế để làm việc với nhiều hệ quản trị cơ sở dữ liệu phổ biến như PostgreSQL, MySQL, SQLite và SQL Server. Nó cho phép bạn xác định cấu trúc cơ sở dữ liệu bằng cách sử dụng ngôn ngữ Prisma Schema, sau đó tạo ra mã TypeScript hoặc JavaScript để tạo, đọc, cập nhật và xóa dữ liệu trong cơ sở dữ liệu.Prisma sử dụng một ngôn ngữ riêng gọi là Prisma Query Language (PQL) để tạo và thực thi truy vấn cơ sở dữ liệu. PQL là một ngôn ngữ độc lập với hệ quản trị cơ sở dữ liệu, giúp bạn tạo ra các truy vấn đồng nhất cho nhiều loại cơ sở dữ liệu khác nhau. Điều này có nghĩa là bạn có thể sử dụng cùng một cú pháp để thực hiện các truy vấn dù bạn đang làm việc với PostgreSQL, MySQL, SQLite hay SQL Server.
Vậy thằng Prisma này giải quyết được vấn đề là anh em làm việc với mỗi loại database thì đều phải hỏi các cú pháp query của nó thì giờ chỉ cần biết syntax của PQL thồi là đỡ phải nhớ nhiều rồi. Còn nhiều nguyên nhân lý do sâu xa nên chọn Prisma thì anh em đọc ở trang chủ của nó: Why Prisma? Comparison with SQL query builders & ORMs
Mình thấy default thì database là thằng PostgreSQL nhưng trước giờ mình dùng Mongodb free cũng quen thuộc hơn nên mình sẽ chọn Mongodb để dùng với Prisma nhé. Hướng dẫn setup thì anh em xem ở đây: Connect your database | typescript-mongodb (prisma.io)
Mình sẽ thay connection string của mình vào DATABASE_URL trong .env file và update file schema.prisma ở folder prisma như sau:
// This is your Prisma schema file,
// learn more about it in the docs: https://pris.ly/d/prisma-schema

generator client {
  provider        = "prisma-client-js"
  previewFeatures = ["mongodb"]
}


datasource db {
  provider = "mongodb"
  // NOTE: When using mysql or sqlserver, uncomment the @db.Text annotations in model Account below
  // Further reading:
  // https://next-auth.js.org/adapters/prisma#create-the-prisma-schema
  // https://www.prisma.io/docs/reference/api-reference/prisma-schema-reference#string
  url      = env("DATABASE_URL")
}


model Example {
  id        String   @id @default(auto()) @map("_id") @db.ObjectId
  createdAt DateTime @default(now())
  updatedAt DateTime @updatedAt
}


// Necessary for Next auth
model Account {
  id                String  @id @default(auto()) @map("_id") @db.ObjectId
  userId            String
  type              String
  provider          String
  providerAccountId String
  refresh_token     String? // @db.Text
  access_token      String? // @db.Text
  expires_at        Int?
  token_type        String?
  scope             String?
  id_token          String? // @db.Text
  session_state     String?
  user              User    @relation(fields: [userId], references: [id], onDelete: Cascade)


  @@unique([provider, providerAccountId])
}


model Session {
  id           String   @id @default(auto()) @map("_id") @db.ObjectId
  sessionToken String   @unique
  userId       String
  expires      DateTime
  user         User     @relation(fields: [userId], references: [id], onDelete: Cascade)
}


model User {
  id            String    @id @default(auto()) @map("_id") @db.ObjectId
  name          String?
  email         String?   @unique
  emailVerified DateTime?
  image         String?
  accounts      Account[]
  sessions      Session[]
}


model VerificationToken {
  id         String   @id @default(auto()) @map("_id") @db.ObjectId
  identifier String
  token      String   @unique
  expires    DateTime


  @@unique([identifier, token])
}
Để tiện trong việc dễ dàng đọc file .prisma thì anh em nên cài extenstion tên là: Prisma luôn nhé. Nó highlight với báo lỗi các thứ cho luôn =))
Sau đó anh em run lệnh npx prisma db push để push các model schema lên database:
npx prisma db push
Rồi run lệnh npx prisma studio rồi mở link local này http://localhost:5555/ để xem được trực quan database luôn khá là tiện nhé.
npx prisma studio
Authentication với NextAuth
Mặc định auth của app là Discord, anh em chỉ cần add clientId và secret key từ Discord vào file .env là được. Nhưng mình thì muốn auth với Github hơn vì đa số anh em dev thì đều có account Github mà. Hoặc anh em có thể dùng cả 2, với mình thì chỉ với Github thôi.
Trước hết anh em đăng nhập vào github bằng account của mình > Settings > Developer settings > OAuth apps > tạo new OAuth app > Điền thông tin phù hợp với anh em như bên dưới của mình:
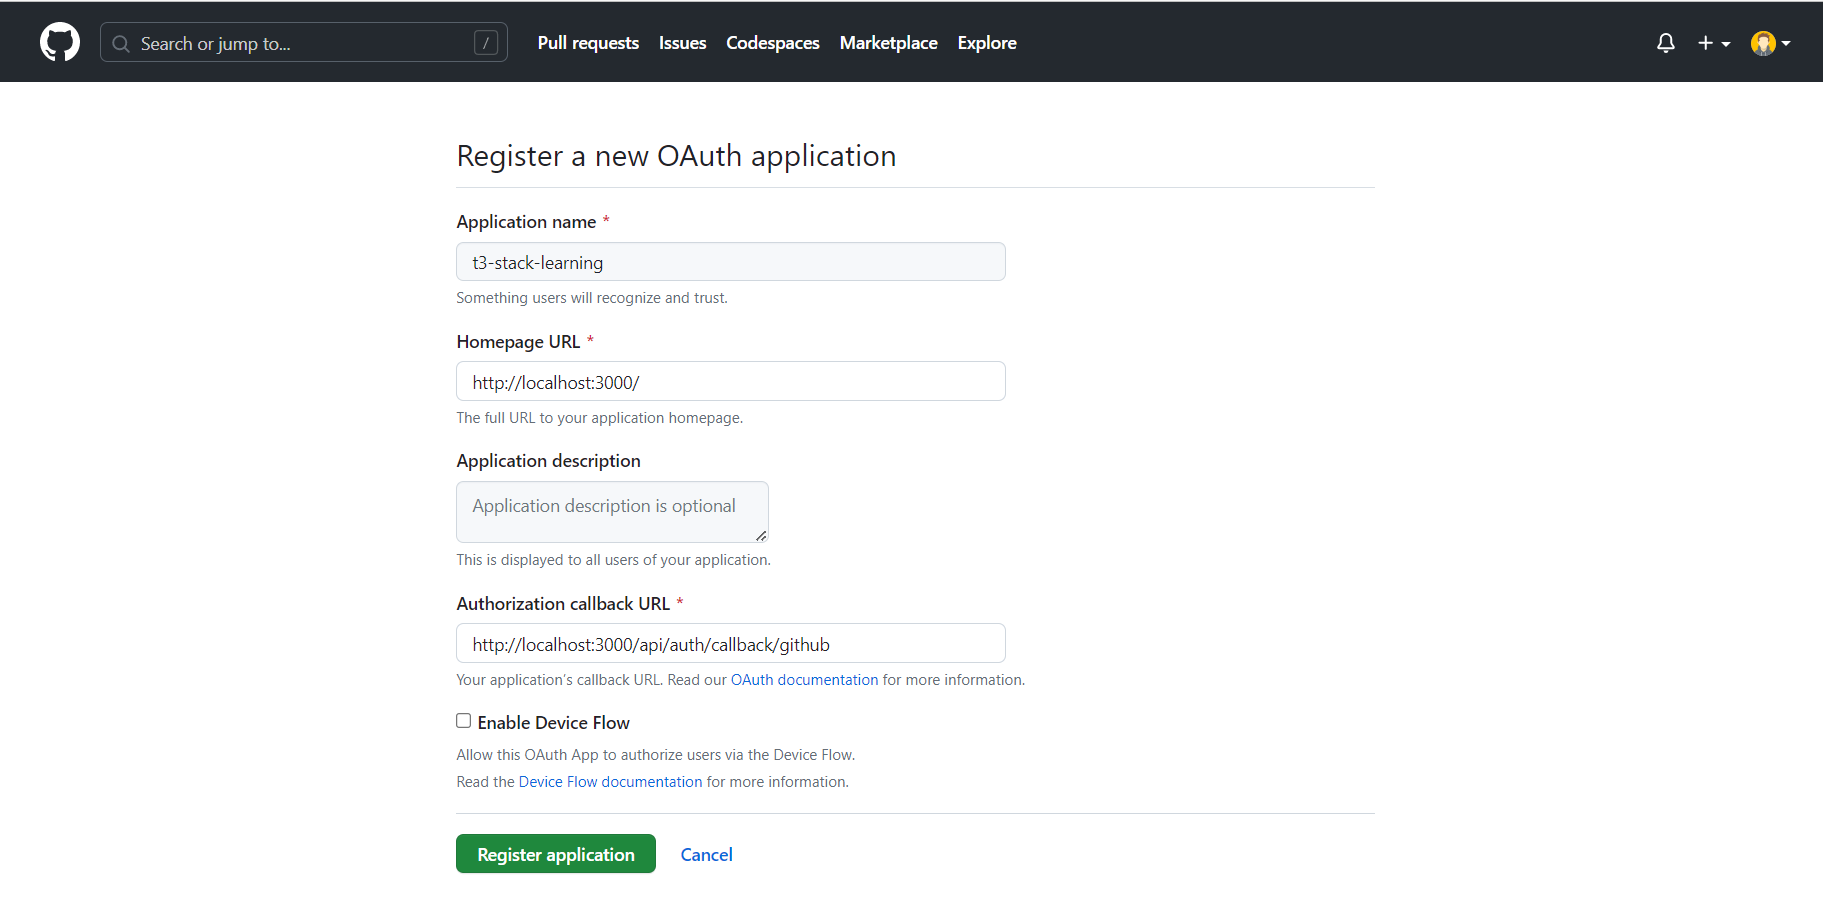
Sau đó bấm Register application và lấy được client ID và client secret key.
Rồi anh em thay thế các file mà dùng DISCORD_CLIENT_ID và DISCORD_CLIENT_SECRET thành Github:
/** env.mjs file  */
import { z } from "zod";
import { createEnv } from "@t3-oss/env-nextjs";


export const env = createEnv({
  /**
   * Specify your server-side environment variables schema here. This way you can ensure the app
   * isn't built with invalid env vars.
   */
  server: {
    DATABASE_URL: z.string().url(),
    NODE_ENV: z.enum(["development", "test", "production"]),
    NEXTAUTH_SECRET:
      process.env.NODE_ENV === "production"
        ? z.string().min(1)
        : z.string().min(1).optional(),
    NEXTAUTH_URL: z.preprocess(
      // This makes Vercel deployments not fail if you don't set NEXTAUTH_URL
      // Since NextAuth.js automatically uses the VERCEL_URL if present.
      (str) => process.env.VERCEL_URL ?? str,
      // VERCEL_URL doesn't include `https` so it cant be validated as a URL
      process.env.VERCEL ? z.string().min(1) : z.string().url(),
    ),
    // Add `.min(1) on ID and SECRET if you want to make sure they're not empty
    GITHUB_CLIENT_ID: z.string(),
    GITHUB_CLIENT_SECRET: z.string(),
  },

/**
   * Specify your client-side environment variables schema here. This way you can ensure the app
   * isn't built with invalid env vars. To expose them to the client, prefix them with
   * `NEXT_PUBLIC_`.
   */
  client: {
    // NEXT_PUBLIC_CLIENTVAR: z.string().min(1),
  },

  /**
   * You can't destruct `process.env` as a regular object in the Next.js edge runtimes (e.g.
   * middlewares) or client-side so we need to destruct manually.
   */
  runtimeEnv: {
    DATABASE_URL: process.env.DATABASE_URL,
    NODE_ENV: process.env.NODE_ENV,
    NEXTAUTH_SECRET: process.env.NEXTAUTH_SECRET,
    NEXTAUTH_URL: process.env.NEXTAUTH_URL,
    GITHUB_CLIENT_ID: process.env.GITHUB_CLIENT_ID,
    GITHUB_CLIENT_SECRET: process.env.GITHUB_CLIENT_SECRET,
  },
});
/** auth.ts */
import { type GetServerSidePropsContext } from "next";
import {
  getServerSession,
  type NextAuthOptions,
  type DefaultSession,
} from "next-auth";
import GithubProvider from "next-auth/providers/github";
import { PrismaAdapter } from "@next-auth/prisma-adapter";
import { env } from "~/env.mjs";
import { prisma } from "~/server/db";


/**
 * Module augmentation for `next-auth` types. Allows us to add custom properties to the `session`
 * object and keep type safety.
 *
 * @see https://next-auth.js.org/getting-started/typescript#module-augmentation
 */
declare module "next-auth" {
  interface Session extends DefaultSession {
    user: {
      id: string;
      // ...other properties
      // role: UserRole;
    } & DefaultSession["user"];
  }


  // interface User {
  //   // ...other properties
  //   // role: UserRole;
  // }
}


/**
 * Options for NextAuth.js used to configure adapters, providers, callbacks, etc.
 *
 * @see https://next-auth.js.org/configuration/options
 */
export const authOptions: NextAuthOptions = {
  callbacks: {
    session: ({ session, user }) => ({
      ...session,
      user: {
        ...session.user,
        id: user.id,
      },
    }),
  },
  adapter: PrismaAdapter(prisma),
  providers: [
    GithubProvider({
      clientId: env.GITHUB_CLIENT_ID,
      clientSecret: env.GITHUB_CLIENT_SECRET,
    }),
    /**
     * ...add more providers here.
     */
  ],
};


/**
 * Wrapper for `getServerSession` so that you don't need to import the `authOptions` in every file.
 *
 * @see https://next-auth.js.org/configuration/nextjs
 */
export const getServerAuthSession = (ctx: {
  req: GetServerSidePropsContext["req"];
  res: GetServerSidePropsContext["res"];
}) => {
  return getServerSession(ctx.req, ctx.res, authOptions);
};
# .env file
DATABASE_URL="file:./db.sqlite"
# Next Auth
# You can generate a new secret on the command line with:
# openssl rand -base64 32
# or with node: crypto.randomUUID()
# https://next-auth.js.org/configuration/options#secret
NEXTAUTH_SECRET="2c309200-d0e7-4e6c-9e4d-9b3fe9b51356"
NEXTAUTH_URL="http://localhost:3000"


# Next Auth Github Provider
GITHUB_CLIENT_ID=""
GITHUB_CLIENT_SECRET=""
Thế là xong rồi, rất là đơn giản đúng không. Nếu anh em muốn tìm hiểu thêm như login với google, facebook,... thì có thể xem thêm ở trang chủ của NextAuth: Getting Started | NextAuth.js (next-auth.js.org)
Sau đó anh em nhớ khởi động lại app và run lại với: npm run dev là done
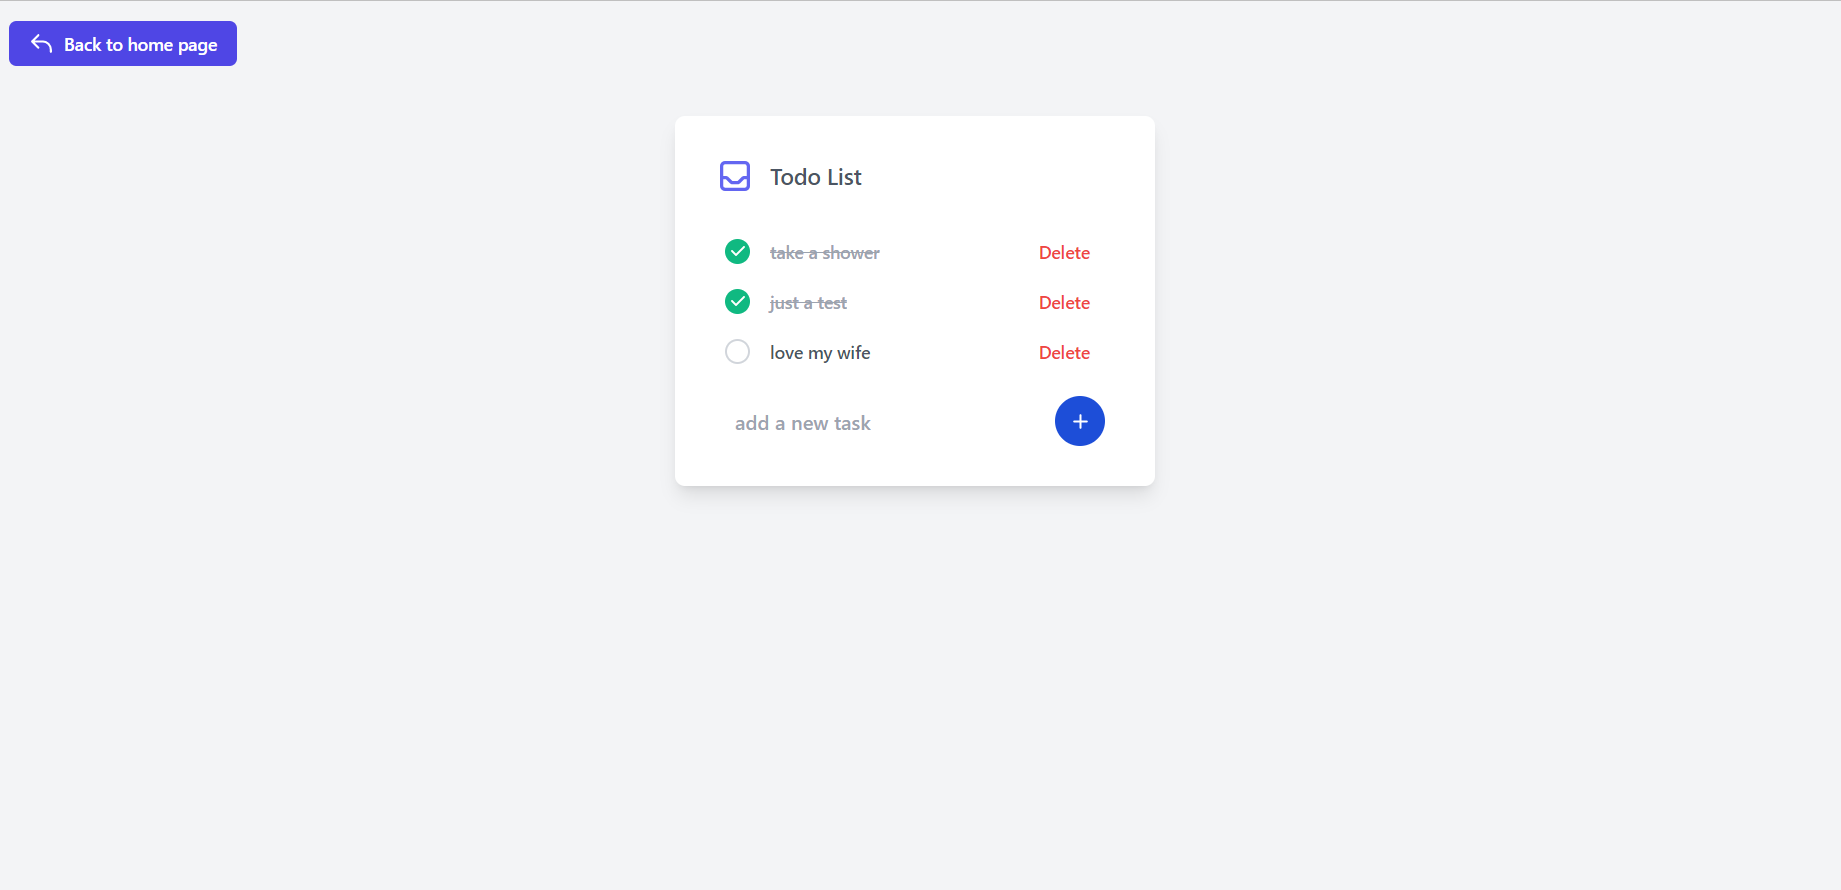
Tạo Todo page UI
Mình sẽ tạo một trang Todo để show list việc cần làm là Todo component, mỗi việc sẽ là 1 component tên là TodoItem css thì dĩ nhiên là dùng tailwind css rồi cho nó nhanh.
// src/pages/todo.tsx
import { type NextPage } from "next";

import Link from "next/link";

const Todo: NextPage = () => {

  return (
    <div className="h-screen w-screen bg-gray-100 p-4">

      <Link

        href="/"

        className="inline-flex items-center rounded-md bg-indigo-500 px-4 py-2 text-sm font-medium text-white hover:bg-indigo-600"

      >

        <svg

          xmlns="http://www.w3.org/2000/svg"

          className="mr-2 h-5 w-5"

          fill="none"

          viewBox="0 0 24 24"

          stroke="currentColor"

        >

          <path

            stroke-linecap="round"

            stroke-linejoin="round"

            stroke-width="2"

            d="M3 10h10a8 8 0 018 8v2M3 10l6 6m-6-6l6-6"

          />

        </svg>

        Back to home page

      </Link>

      <div className="mt-10 flex items-center justify-center font-medium">

        <div className="flex h-full flex-grow items-center justify-center  text-gray-600">

          <div className="w-96 max-w-full rounded-lg bg-white p-8 shadow-lg">

            <div className="mb-6 flex items-center">

              <svg

                className="h-8 w-8 stroke-current text-indigo-500"

                xmlns="http://www.w3.org/2000/svg"

                fill="none"

                viewBox="0 0 24 24"

                stroke="currentColor"

              >

                <path

                  stroke-linecap="round"

                  stroke-linejoin="round"

                  stroke-width="2"

                  d="M20 13V6a2 2 0 00-2-2H6a2 2 0 00-2 2v7m16 0v5a2 2 0 01-2 2H6a2 2 0 01-2-2v-5m16 0h-2.586a1 1 0 00-.707.293l-2.414 2.414a1 1 0 01-.707.293h-3.172a1 1 0 01-.707-.293l-2.414-2.414A1 1 0 006.586 13H4"

                />

              </svg>

              <h4 className="ml-3 text-lg font-semibold">Todo List</h4>

            </div>

            <TodoItem name="nau com" id={"1"} complete={false} />

            <TodoItem name="rau bat" id={"2"} complete={false} />

            <TodoItem name="giat quan ao" id={"3"} complete={false} />

            <TodoItem name="learning English 1h" id={"4"} complete={false} />

            <TodoItem name="ve sinh ca nhan" id={"1"} complete={true} />

            <div className="mt-4 flex items-center justify-between gap-2">

              <input

                className="ml-4 h-8 w-full flex-grow bg-transparent font-medium focus:outline-none"

                type="text"

                placeholder="add a new task"

              />

              <button

                type="button"

                className="mr-2 inline-flex items-center rounded-full bg-blue-700 p-2.5 text-center text-sm font-medium text-white hover:bg-blue-800 focus:outline-none focus:ring-4 focus:ring-blue-300 dark:bg-blue-600 dark:hover:bg-blue-700 dark:focus:ring-blue-800"

              >

                <svg

                  className="h-5 w-5 fill-current text-white"

                  xmlns="http://www.w3.org/2000/svg"

                  fill="none"

                  viewBox="0 0 24 24"

                  stroke="currentColor"

                >

                  <path

                    stroke-linecap="round"

                    stroke-linejoin="round"

                    stroke-width="2"

                    d="M12 6v6m0 0v6m0-6h6m-6 0H6"

                  />

                </svg>

                <span className="sr-only">add button</span>

              </button>

            </div>

          </div>

        </div>

      </div>

    </div>

  );

};


const TodoItem: NextPage<{

  name: string;

  complete: boolean;

  id: string;

}> = ({ name, complete, id }) => {

  return (

    <div className="flex items-center justify-between">

      <div>

        <input className="hidden" type="checkbox" id={id} checked={complete} />

        <label

          className="flex h-10 cursor-pointer items-center rounded px-2 hover:bg-gray-100"

          htmlFor="task_5"

        >

          <span className="flex h-5 w-5 items-center justify-center rounded-full border-2 border-gray-300 text-transparent">

            <svg

              className="h-4 w-4 fill-current"

              xmlns="http://www.w3.org/2000/svg"

              viewBox="0 0 20 20"

              fill="currentColor"

            >

              <path

                fill-rule="evenodd"

                d="M16.707 5.293a1 1 0 010 1.414l-8 8a1 1 0 01-1.414 0l-4-4a1 1 0 011.414-1.414L8 12.586l7.293-7.293a1 1 0 011.414 0z"

                clip-rule="evenodd"

              />

            </svg>

          </span>

          <span className="ml-4 text-sm">{name}</span>

        </label>

      </div>

      <button

        type="button"

        className="font-small rounded-lg bg-transparent px-5 py-2.5 text-sm text-red-500  hover:text-red-600"

      >

        Delete

      </button>

    </div>

  );

};

export default Todo;
Tuy đã dùng tailwind rồi nhưng đôi khi anh em vẫn cần phải style hay custom, mình sẽ tạo thêm 1 file css để style cho trang Todo này và import nó vào file css global nhé.
/* src/styles/todo.css */
input[type="checkbox"]:checked + label span:first-of-type {
  background-color: #10b981;
  border-color: #10b981;
  color: #fff;
}

input[type="checkbox"]:checked + label span:nth-of-type(2) {
  text-decoration: line-through;
  color: #9ca3af;
}
/* src/styles/globals.css */
@tailwind base;
@tailwind components;
@tailwind utilities;


@import "todo";
Vậy là chúng ta đã có trang todo rồi nhưng sẽ cần phải add nó vào trang home page. Mình sẽ sửa trang index (home page) 1 chút như bên dưới.
// src/pages/index.tsx
import { type NextPage } from "next";
import { signIn, signOut, useSession } from "next-auth/react";
import Head from "next/head";
import Link from "next/link";


const Home: NextPage = () => {
  return (
    <>
      <Head>
        <title>Create T3 App</title>
        <meta name="description" content="Generated by create-t3-app" />
        <link rel="icon" href="/favicon.ico" />
      </Head>
      <main className="flex min-h-screen flex-col items-center justify-center bg-gradient-to-b from-[#2e026d] to-[#15162c]">
        <div className="container flex flex-col items-center justify-center gap-12 px-4 py-16 ">
          <h1 className="text-5xl font-extrabold tracking-tight text-white sm:text-[5rem]">
            Create <span className="text-[hsl(280,100%,70%)]">T3</span> App
          </h1>
          <div className="grid grid-cols-1 gap-4 sm:grid-cols-2 md:gap-8">
            <Link
              className="flex max-w-xs flex-col gap-4 rounded-xl bg-white/10 p-4 text-white hover:bg-white/20"
              href="https://create.t3.gg/en/introduction"
              target="_blank"
            >
              <h3 className="text-2xl font-bold">Documentation →</h3>
              <div className="text-lg">
                Learn more about Create T3 App, the libraries it uses, and how
                to deploy it.
              </div>
            </Link>
            <Link
              className="flex max-w-xs flex-col gap-4 rounded-xl bg-white/10 p-4 text-white hover:bg-white/20"
              href="/todo"
            >
              <h3 className="text-2xl font-bold">Todo List →</h3>
              <div className="text-lg">
                Go to this page to see what you have to do today
              </div>
            </Link>
          </div>
          <div className="flex flex-col items-center gap-2">
            <AuthShowcase />
          </div>
        </div>
      </main>
    </>
  );
};


export default Home;


const AuthShowcase: React.FC = () => {
  const { data: sessionData } = useSession();


  return (
    <div className="flex flex-col items-center justify-center gap-4">
      <p className="text-center text-2xl text-white">
        {sessionData && <span>Logged in as {sessionData.user?.name}</span>}
      </p>
      <button
        className="rounded-full bg-white/10 px-10 py-3 font-semibold text-white no-underline transition hover:bg-white/20"
        onClick={
          sessionData
            ? () => void signOut()
            : () => void signIn("github", { callbackUrl: "/todo" })
        }
      >
        {sessionData ? "Sign out" : "Sign in"}
      </button>
    </div>
  );
};
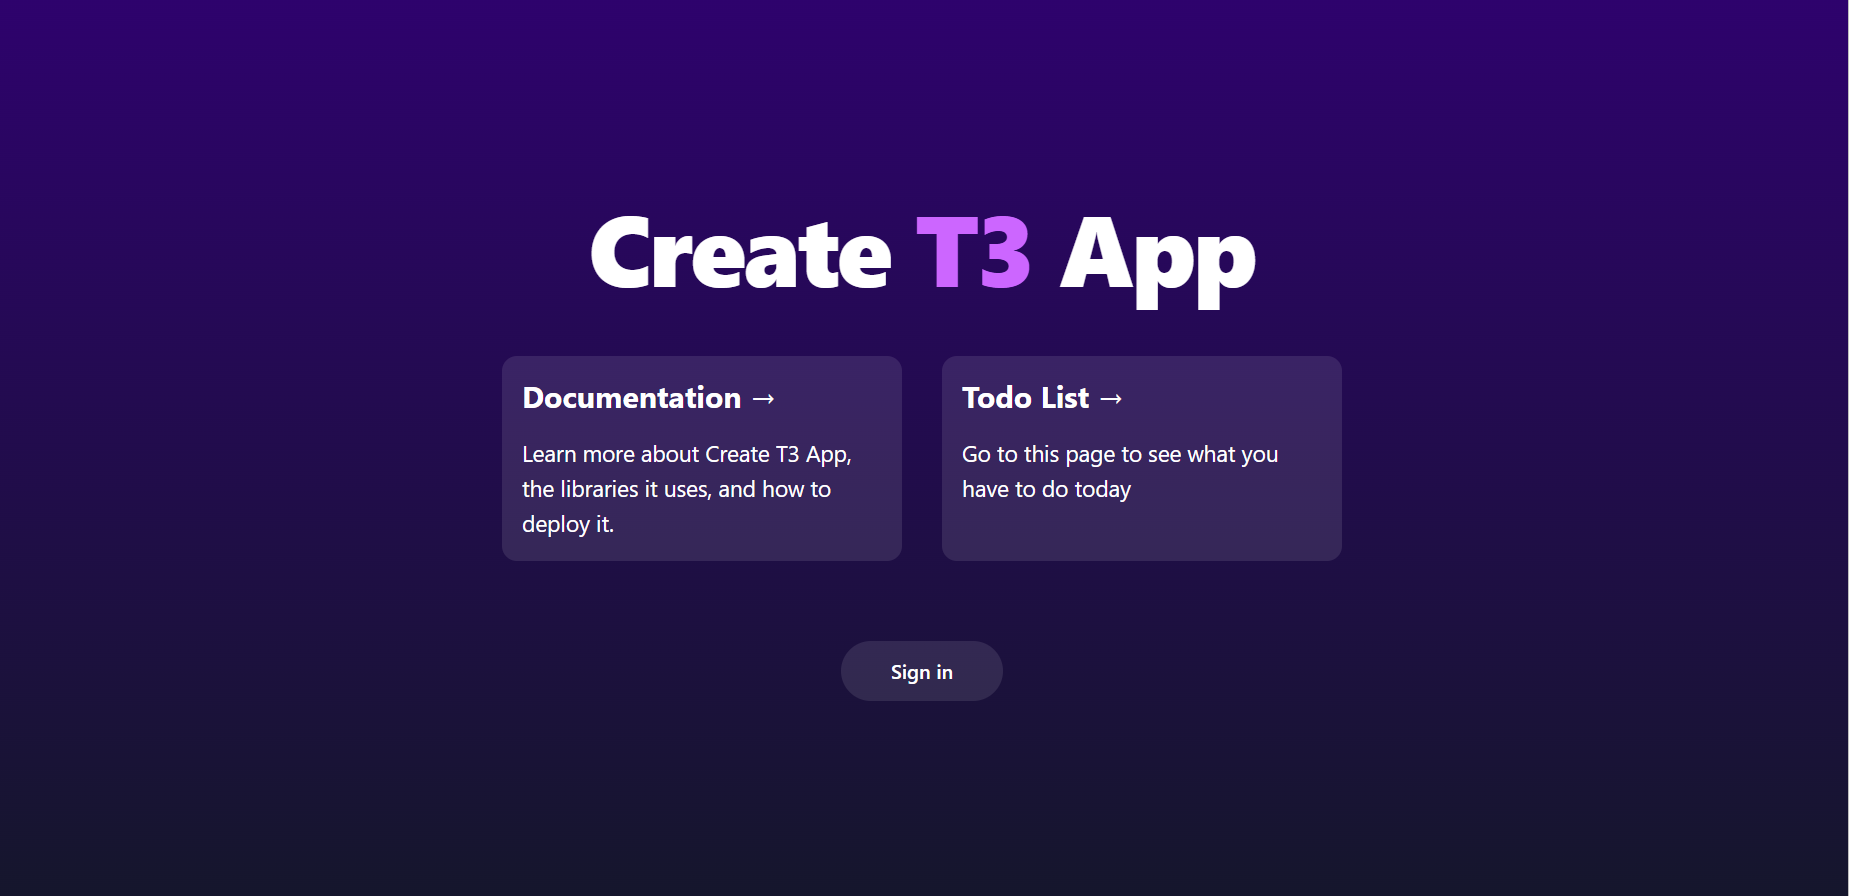
Giờ chúng ta có trang home page thế này =))
Còn trang todo sẽ thế này:
Config Private Route
Mình đã tạo xong UI cho trang Todo, giờ mình muốn chỉ khi login rồi thì mới có thể vào được trang todo thì sẽ làm thế nào?
Qua nghiên cứu đọc doc bên Nextjs thì từ version Nextjs 12 thì có thêm feature gọi là middleware, nó có thể làm rất nhiều thứ hay ho như: Set headers, using cookies, Response,... đặc biệt Matching paths có thể giúp anh em làm được private route chỉ với vài dòng config trong 1 file là middleware.ts cùng cấp với thư mục pages như sau:
// src/middleware.ts
export { default } from "next-auth/middleware"

export const config = { matcher: ["/todo"] }
Những route nào anh em muốn private thì put nó vào list matcher là được. Nhưng khi mình config như trên thì gặp 1 số lỗi như login xong thì không back về trang callback, hoặc click vào trang Todo khi chưa login thì vẫn được??? Sau một hồi tìm hiểu thì mình sửa lại file auth.ts như bên dưới thì được: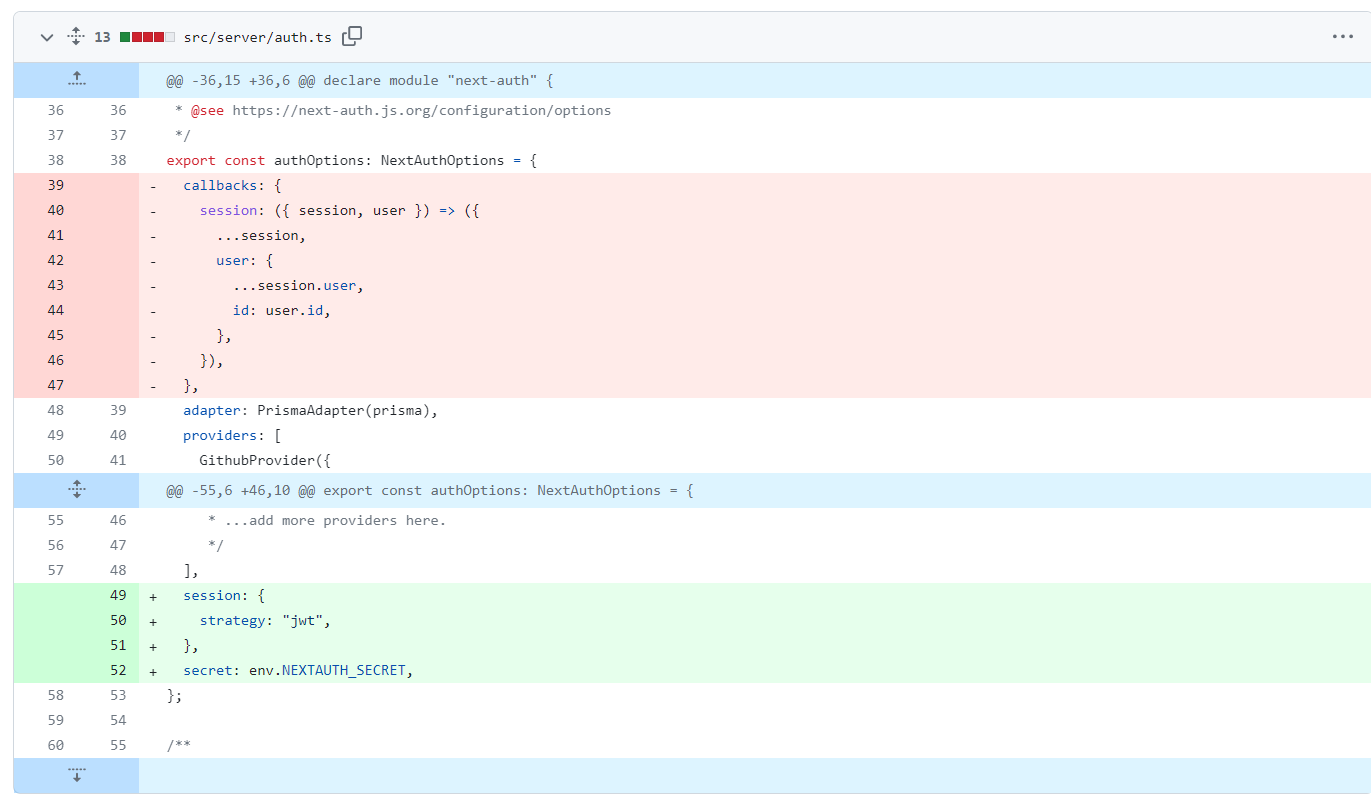
Tạo Todo APIs
Giờ chúng ta chỉ cần làm các api todo để integrate với phần UI bên trên là ok đúng không. Vậy cùng xem cách viết API trên Nextjs với prisma và TRPC nó thế nào nhé.
Anh em có thể đọc code api example để biết qua cách tạo API và sử dụng nó ở phía client thế nào. Cũng không có gì phức tạo, mình sẽ xóa file api example đi vào tạo file todo API gồm: add todo, get todo list, update todo status và delete todo như sau:
Trước hết mình sẽ xóa model Example vào thay vào đó là model cho Todo trong database:
// prisma/schema.prisma
model Todo {
  id        String   @id @default(auto()) @map("_id") @db.ObjectId
  name      String
  complete  Boolean
  createdAt DateTime @default(now())
  updatedAt DateTime @updatedAt
}
Viết các api cho todo:
// src/server/api/routers/todo.ts
import { z } from "zod";
import {
  createTRPCRouter,
  publicProcedure,
  protectedProcedure,
} from "~/server/api/trpc";

export const todoRouter = createTRPCRouter({
  addTodo: publicProcedure
    .input(z.object({ name: z.string() }))
    .mutation(({ ctx, input }) => {
      return ctx.prisma.todo.create({
        data: {
          name: input.name,
          complete: false,
        },
      });
    }),

  todoList: publicProcedure.query(({ ctx }) => {
    return ctx.prisma.todo.findMany();
  }),

  deleteTodo: protectedProcedure
    .input(z.object({ id: z.string() }))
    .mutation(({ ctx, input }) => {
      return ctx.prisma.todo.delete({
        where: {
          id: input.id,
        },
      });
    }),

  updateTodoStatus: protectedProcedure
    .input(z.object({ id: z.string(), complete: z.boolean() }))
    .mutation(({ ctx, input }) => {
      console.log('id, complete', input)
      return ctx.prisma.todo.update({
        where: {
          id: input.id,
        },
        data: {
          complete: input.complete,
        },
      });
    }),
});
Add todo router vào file root router:
// src/server/api/root.ts
import { createTRPCRouter } from "~/server/api/trpc";
import { todoRouter } from "~/server/api/routers/todo";
/**
 * This is the primary router for your server.
 *
 * All routers added in /api/routers should be manually added here.
 */
export const appRouter = createTRPCRouter({
  todo: todoRouter,
});

// export type definition of API
export type AppRouter = typeof appRouter;
Và cuối cùng là áp dụng nó vào file UI Todo.tsx:
// src/pages/todo.tsx
import { type NextPage } from "next";
import { useSession } from "next-auth/react";
import Link from "next/link";
import { useEffect, useState } from "react";
import { api } from "~/utils/api";

const Todo: NextPage = () => {
  const [todoInput, setTodoInput] = useState<string>("");
  const { data: sessionData } = useSession();
  const { data: todos, refetch: refetchTodos } = api.todo.todoList.useQuery(
    undefined, // no input
    { enabled: sessionData?.user !== undefined }
  );
  const createTodo = api.todo.addTodo.useMutation({
    onSuccess: () => {
      void refetchTodos();
    },
  });

  const handleAddTodo = () => {
    createTodo.mutate({
      name: todoInput,
    });
    setTodoInput("");
  };


  return (
    <div className="h-screen w-screen bg-gray-100 p-4">
      <Link
        href="/"
        className="inline-flex items-center rounded-md bg-indigo-500 px-4 py-2 text-sm font-medium text-white hover:bg-indigo-600"
      >
        <svg
          xmlns="http://www.w3.org/2000/svg"
          className="mr-2 h-5 w-5"
          fill="none"
          viewBox="0 0 24 24"
          stroke="currentColor"
        >
          <path
            stroke-linecap="round"
            stroke-linejoin="round"
            stroke-width="2"
            d="M3 10h10a8 8 0 018 8v2M3 10l6 6m-6-6l6-6"
          />
        </svg>
        Back to home page
      </Link>
      <div className="mt-10 flex items-center justify-center font-medium">
        <div className="flex h-full flex-grow items-center justify-center  text-gray-600">
          <div className="w-96 max-w-full rounded-lg bg-white p-8 shadow-lg">
            <div className="mb-6 flex items-center">
              <svg
                className="h-8 w-8 stroke-current text-indigo-500"
                xmlns="http://www.w3.org/2000/svg"
                fill="none"
                viewBox="0 0 24 24"
                stroke="currentColor"
              >
                <path
                  stroke-linecap="round"
                  stroke-linejoin="round"
                  stroke-width="2"
                  d="M20 13V6a2 2 0 00-2-2H6a2 2 0 00-2 2v7m16 0v5a2 2 0 01-2 2H6a2 2 0 01-2-2v-5m16 0h-2.586a1 1 0 00-.707.293l-2.414 2.414a1 1 0 01-.707.293h-3.172a1 1 0 01-.707-.293l-2.414-2.414A1 1 0 006.586 13H4"
                />
              </svg>
              <h4 className="ml-3 text-lg font-semibold">Todo List</h4>
            </div>
            {todos &&
              todos.length > 0 &&
              todos.map((todo) => (
                <TodoItem
                  key={todo.id}
                  name={todo.name}
                  id={todo.id}
                  complete={todo.complete}
                />
              ))}
            <div className="mt-4 flex items-center justify-between gap-2">
              <input
                className="ml-4 h-8 w-full flex-grow bg-transparent font-medium focus:outline-none"
                type="text"
                value={todoInput}
                onChange={(e) => setTodoInput(e.target.value)}
                placeholder="add a new task"
              />
              <button
                onClick={handleAddTodo}
                disabled={!todoInput}
                type="button"
                className="mr-2 inline-flex items-center rounded-full bg-blue-700 p-2.5 text-center text-sm font-medium text-white hover:bg-blue-800 focus:outline-none focus:ring-4 focus:ring-blue-300 dark:bg-blue-600 dark:hover:bg-blue-700 dark:focus:ring-blue-800"
              >
                <svg
                  className="h-5 w-5 fill-current text-white"
                  xmlns="http://www.w3.org/2000/svg"
                  fill="none"
                  viewBox="0 0 24 24"
                  stroke="currentColor"
                >
                  <path
                    stroke-linecap="round"
                    stroke-linejoin="round"
                    stroke-width="2"
                    d="M12 6v6m0 0v6m0-6h6m-6 0H6"
                  />
                </svg>
                <span className="sr-only">add button</span>
              </button>
            </div>
          </div>
        </div>
      </div>
    </div>
  );
};

const TodoItem: NextPage<{
  name: string;
  complete: boolean;
  id: string;
}> = ({ name, complete, id }) => {
  const [isDone, setIsDone] = useState<boolean>(complete);
  const [debouncedValue, setDebouncedValue] = useState<boolean>(complete);
  const { data: sessionData } = useSession();
  const { refetch: refetchTodos } = api.todo.todoList.useQuery(
    undefined, // no input
    { enabled: sessionData?.user !== undefined }
  );
  const deleteTodo = api.todo.deleteTodo.useMutation({
    onSuccess: () => {
      void refetchTodos();
    },
  });
  const updateTodoStatus = api.todo.updateTodoStatus.useMutation({
    onSuccess: () => {
      void refetchTodos();
    },
  });

  const handelDeleteTodo = () => {
    deleteTodo.mutate({
      id: id,
    });
  };

  useEffect(() => {
    const handler = setTimeout(() => {
      setDebouncedValue(isDone);
    }, 500);


    return () => {
      clearTimeout(handler);
    };
  }, [isDone]);


  useEffect(() => {
    updateTodoStatus.mutate({
      id: id,
      complete: debouncedValue,
    });
  }, [debouncedValue]);


  return (
    <div className="flex items-center justify-between">
      <div onClick={() => setIsDone((prev) => !prev)}>
        <input
          className="hidden"
          type="checkbox"
          id={id}
          checked={isDone}
          onChange={() => setIsDone((prev) => !prev)}
        />
        <label
          className="flex h-10 cursor-pointer items-center rounded px-2 hover:bg-gray-100"
          htmlFor="task_5"
        >
          <span className="flex h-5 w-5 items-center justify-center rounded-full border-2 border-gray-300 text-transparent">
            <svg
              className="h-4 w-4 fill-current"
              xmlns="http://www.w3.org/2000/svg"
              viewBox="0 0 20 20"
              fill="currentColor"
            >
              <path
                fill-rule="evenodd"
                d="M16.707 5.293a1 1 0 010 1.414l-8 8a1 1 0 01-1.414 0l-4-4a1 1 0 011.414-1.414L8 12.586l7.293-7.293a1 1 0 011.414 0z"
                clip-rule="evenodd"
              />
            </svg>
          </span>
          <span className="ml-4 text-sm">{name}</span>
        </label>
      </div>
      <button
        onClick={handelDeleteTodo}
        type="button"
        className="font-small rounded-lg bg-transparent px-5 py-2.5 text-sm text-red-500  hover:text-red-600"
      >
        Delete
      </button>
    </div>
  );
};

export default Todo;
Deploy app
Để deploy Nextjs app thì mình nghĩ nên dùng vercel để deploy vì nó free và rất nhanh, dùng đồ của nó để nướng nó thì là ngon nhất rồi =))
Push code của anh em lên github của mình rồi vào trang Dashboard – Vercel đăng nhập với account github. Tạo new project => chọn project từ github => giữ nguyên default setup và kéo xuống phần enviroments rồi add tất cả các enviroments trong file .env vào => Deploy
Sau khi deploy thành công thì anh em lấy url hiện tại của app để gắn lại vào Enviroment NEXTAUTH_URL thay vì là local như trước để khi login không bị lỗi nhé. Add xong thì anh em bấm redeploy lại là được nhé.
Thành quả sau khi deploy của mình đây: Create T3 App (t3-stack-learning.vercel.app) <3
Link repo: Gnutyud/t3-stack-learning (github.com)
Túm lại
Như vậy sau khi cùng anh em đi tìm hiểu rốt cuộc T3 stack nó là gì thì như anhh em thấy đấy, nó thực chất không phải 1 một công nghệ mới hay gì cả. T3 stack thực chất là do 1 ông anh tên Theo xây dựng lên như một starter toolkit dùng các công nghệ có sẵn như là: Nextjs, NextAuth, Typecsript, Tailwind, TRPC,... dùng để tạo ra 1 con app fullstack dựa vào Nextjs. Tuy nhiên điểm hay ho ở đây là anh ta chọn các công nghệ trên kết hợp với nhau mọi thứ đều typesafe, giúp anh em code đỡ rác hơn do có typescript nó chửi cho liên tục =))
Theo cảm nhận cá nhân mình thì thấy nó cũng khá là hay ở khoản dùng thằng Prisma và TRPC để code phần API trông nó đơn
giản hơn rất nhiều. Còn thực ra anh em hoàn toàn có thể dùng Nextjs để code fullstack được chỉ là đã có người chọn ra giúp mình các thư viện hay ho để code cùng Nextjs rồi thì mình đỡ phải đi mò tìm các thư viện để làm thôi.
Discussion (undefined)